Free crochet pattern
Crochet 3D Retro Daisy Granny Square
©2025 CraftedComfort

General features
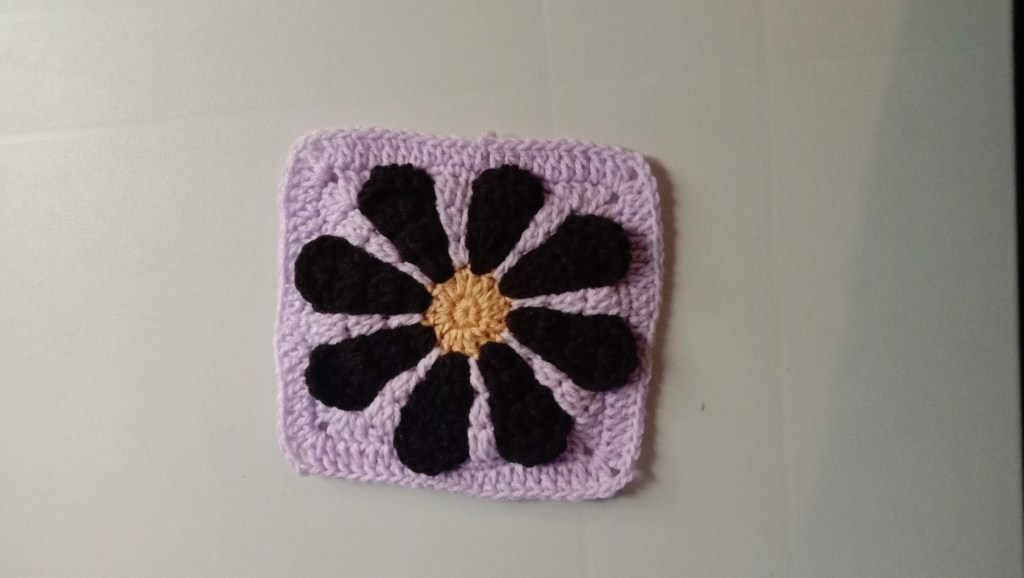
Elevate your gifting game with our exquisite colorful crochet 3D Retro Daisy Granny Squares, which are delightful blend of boho style and seasonal function. These retro daisy crochet granny squares are perfect for any crochet project either wearables like sweaters, cardigans, sweatshirts etc or accessories small, medium like bags of any size or large sizes like blankets.
All rights reserved. This pattern and its contents are only for personal use. Do not copy, edit, and redistribute/sell this pattern. You are welcome to sell finished products with your own small photos in small quantities, but if you do so please give pattern credit to CraftedComfort. Thank you, Crochet Made Easy!
Skill Level: Advanced beginner
Materials used (Notions)
- 100% Acrylic/cotton Dk yarn (unlimited different colors, 100g or 50g per color)
- 100g for the main color
- 4mm Crochet hook
- Scissor
Notes
- This pattern is written in US crochet terms, English.
- This 3D Retro Daisy vintage 70s inspired is worked in rounds.
- The pattern is written using basic crochet sts.
- All measurements provided are in inches.
- For converting inches to cm please use Google or any alternative conversion tool available.
- There are different terms for crocheting in British and American English.
- For British crochet terms, please I highly suggest you to use any crochet terminology charts available.
- Use as many yarn colors as you want to make your 3D retro daisy granny square colorful, 4 colors minimum.
- Each square is worked in rounds
- At the end of each round, do not ch1 or cut off the yarn, unless otherwise it’s stated in the pattern.
Stitches and abbreviations used
- Slip knot – slp knt
- Slip stitch – slp st
- Chain – ch
- Single crochet – Sc
- Double crochet – Dc
- Half double – hdc
- Round – r
Gauge
- 1 square measures approx. 6×6 inches
Finished 3D retro daisy measurements/ Dimensions
Squares measure approx. 6×6inches
Pattern
Crochet retro 3D daisy granny square
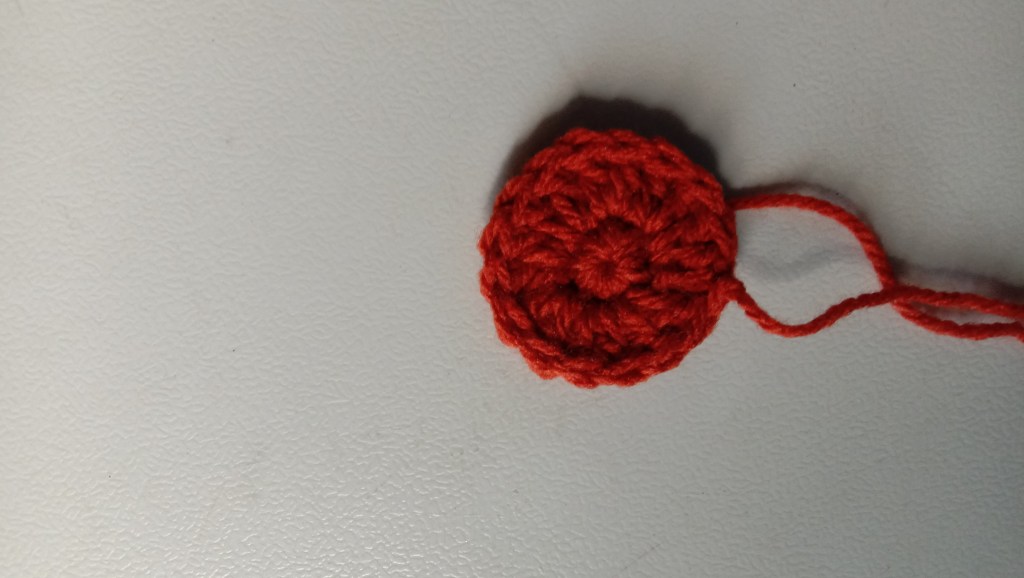
Foundation color: Make a magic ring, ch1,
R1: 8 sc into the magic ring, slp st on top of the 1st sc st you have started with to join your work, ch 1 to close (8sts).

R2: 2Dc in the same st and continue making 2dc in each st around till the end (16sts)
At the end, slp st on top of the 1st st you have started with to join your work, ch1 to close and cut off the yarn.
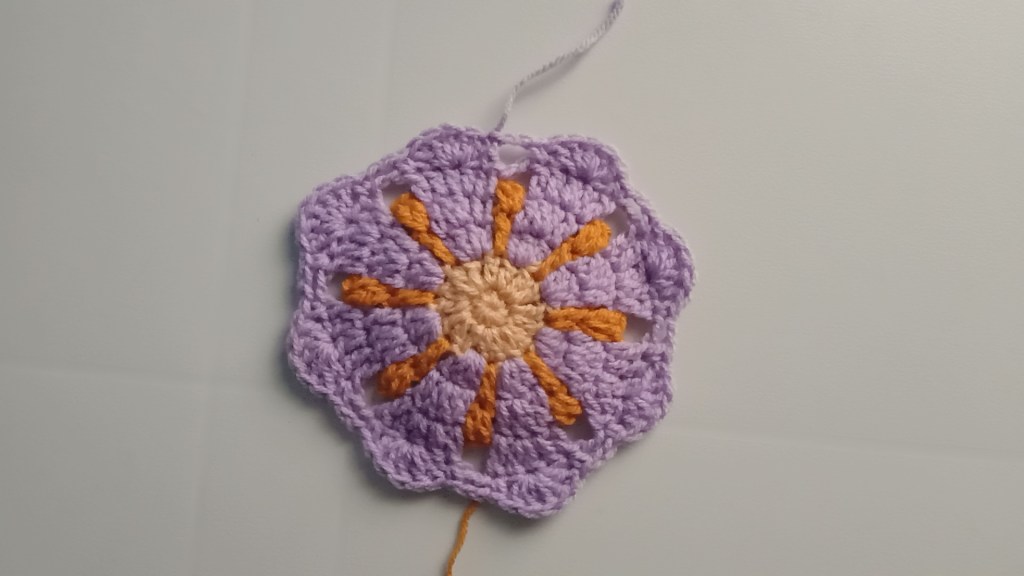
Petal color: Make a slp knt, insert the hook in any st, ch 1 to fully attach the yarn,
R1: 3dc back into the same st, ch1, skp 1 st, 3dc ino the next st (repeat till end of the round)
At the end, slp st on top of the 1st dc st you have started with to join your work, pull the last loop on the hook up and release the hook.
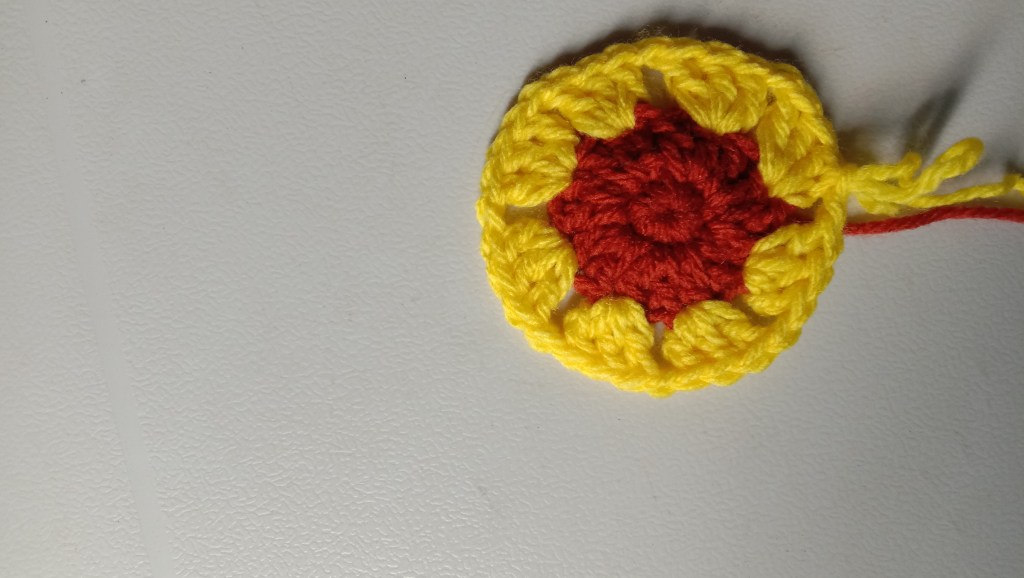
Background color: Make a slp knt, slp st in one of the skped st from the previous round, ch1 to fully attach the yarn, dc into that same st, ch4, dc into the next skped st (for R2: petal color), repeat till end of the round, at the end, slp st on top of the first dc st you have started with to join your work, (pull up the loop and leave it, switch to the petal color).
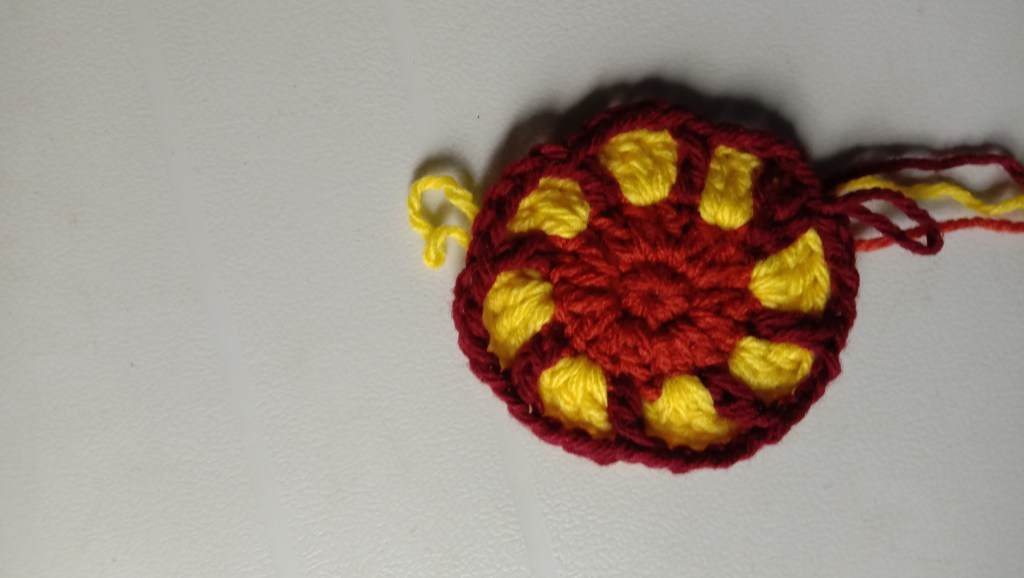
Petal color: Insert the hook into the loop and leverage it into a workable length, dc into the same st, 2dc into the next st, dc into the last st, ch2, (repeat till end of the round), at the end, slp st on top of the first dc st you have started with to join your work, pull up the loop and release the hook.
Background color: Insert the hook into the loop, leverage it into the workable length, 2dc back into the same st, ch5, 2dc into the background color, ch 5, (repeat till end of the round), at the end, slp st on top of the first dc st you have started with, pull up the loop and release the hook.
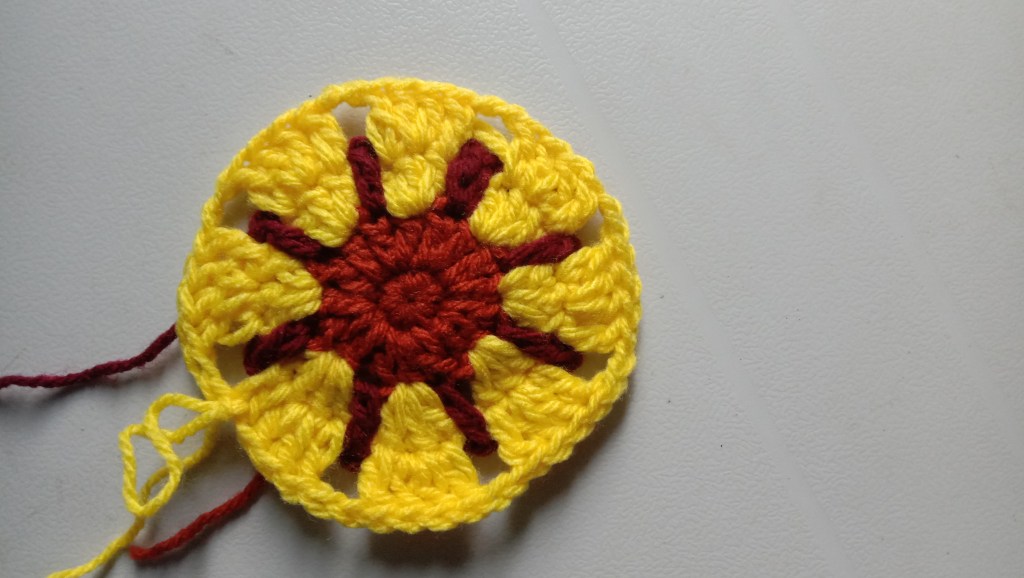
Petal color: Insert the hook into the loop, leverage it into a workable length, dc into the same st, dc into each of the next 2sts, ch2, (repeat till end of the round), at the end, ch2, slp st on top of the first dc st you have started with to join your work.
Do not pull up the loop/ cut off the yarn
Continue with petal color to shape a curve shape for the petal: ch1, sc into same st, skp the next st, 5dc into the next st, kp the next st, sc into the last st, ch2, (repeat till end of the round), at the end, ch2, slp st on top of the first dc st you have started with, ch1 to close and cut off the yarn.
Background color: Insert the hook into the loop, leverage it into a workable length, dc into the same st, 2dc into the next st, bend the petal, 5dc into that ch5 space, (repeat till end of the round), at the end, slp st on top of the first dc st you have started with to join your work, ch1, sc into the same st, sc in each of the next 5 sts, hdc into the next st, dc into the next st, 2dc into the next st, ch2, 2dc back into the same st (1st corner), dc into the next st, hdc into the next st, sc into each of the next 11 sts, (repeat till end of the round, make sure you make sc into each of the last 5 sts, to have a total of 11 sc sts).
At the end, slp st on top of the first sc st you have started with to join your work, ch1 to close.
Hdc into the same st, hdc in each of the next 3 sts, dc into the next 7sts, dc into the corner, ch2, dc back into the same space, dc in each of the next 7sts, hdc into each of the next 4 sts, dc in each of the next 7 sts, hdc in each of the next 4 sts, dc in each of the last 9 sts before the next corner (repeat till end of the round).
Edges: Using any yarn color, slp knt, insert the hook in any st, ch1 to fully attach the yarn, sc back into the same st, continue sc in each st around, at the end, slp st on top of the 1st sc st you have started with to join your work, and cut off the yarn.
You can repeat the edges round as much as you want depending on the size of your squares you want.

Weave in all yarn ends.
Do not hesitate to contact me via email if you encounter a problem regarding this pattern please. Please leave a review on my shop if you find this pattern helpful. Share your finished crochet projects on all of your social media accounts and don’t forget to tag me for credit as I would love to see your finished projects you have made using this pattern. You can also find a tutorial video on my YouTube channel for this colorful 3D retro daisy granny square, don’t forget to subscribe to my channel for more crochet tutorials.
You can also find related patterns in my shop where I used these squares to make a cardigan and tote bag, plus they have tutorials too to assist with the patterns.
Email: helenknittingandcrochet@gmail.com
Connect with me on social media
Instagram, Tiktok, Pinterest & YouTube @CraftedComfort97
Twitter@CraftedComfort97
©2025 CraftedComfort

Leave a comment